Detroit: Become Human The Stratford Tower Walkthrough – Chapter 22: The Stratford Tower. Markus and the group attempt to send a message via broadcast by infiltrating the Stratford Tower.
You can find a magazine on floor 47 near the cafeteria area.
Detroit: Become Human The Stratford Tower Walkthrough
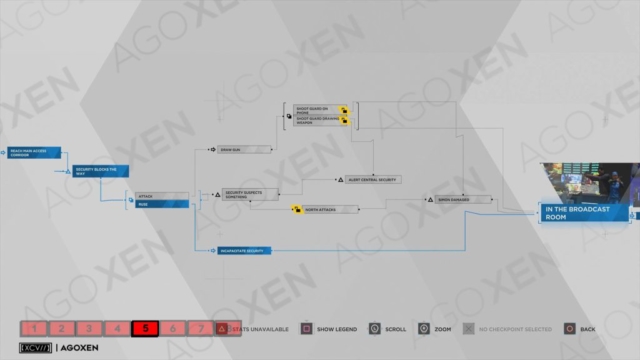
Once you get to the main access corridor, security will block the way to the broadcast room. Markus can choose to Attack or Ruse them. North prefers to attack, but if Markus chooses to fool them, then he will lose favor with her. Josh obviously does not want any violence, so a ruse is his preferred choice.
The dialogue options you choose during the broadcast don’t really matter. Your actions during this chapter matter more towards influencing the public opinion.
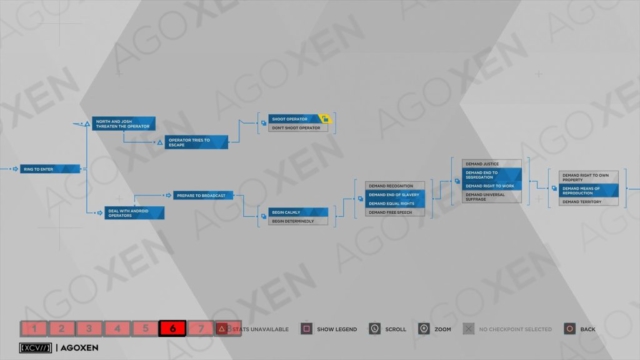
Walkthrough [A] employs the ruse to get into the broadcast room and shooting the operator to ensure that Simon remains alive until the end. Walkthrough [B] uses a violent approach to enter the broadcast room. However the operator that runs out is not shot, just to show the opposite consequence of Walkthrough [A].
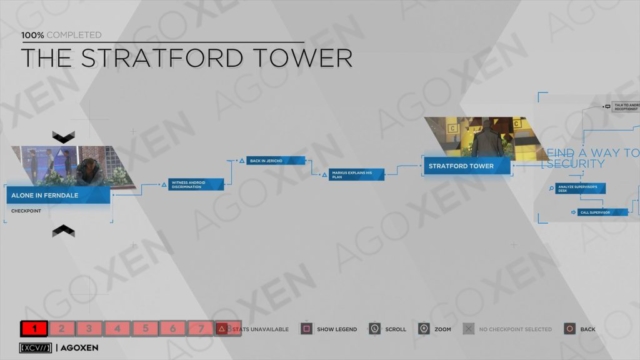
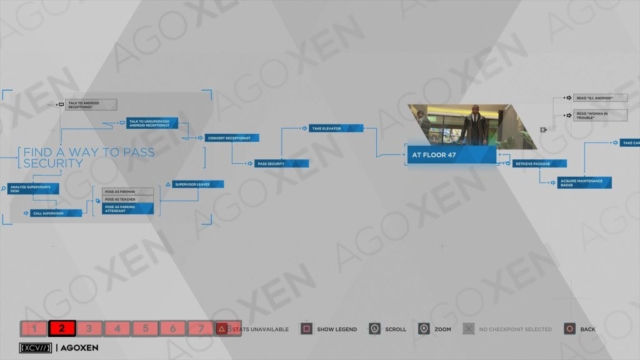
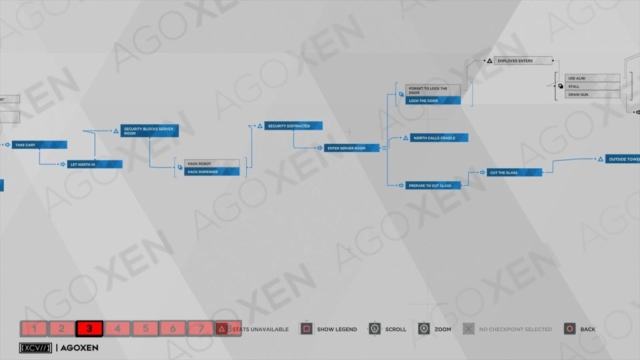
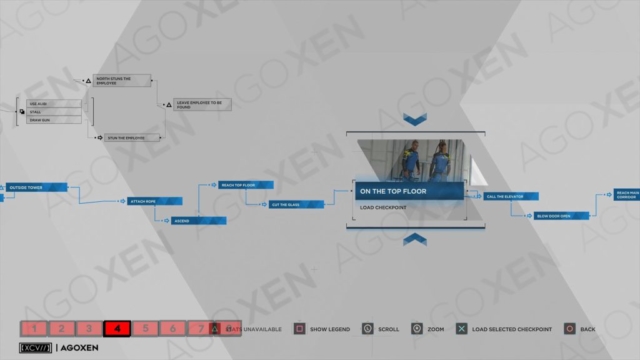
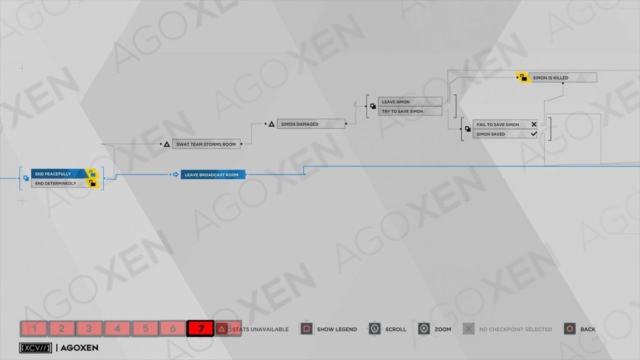
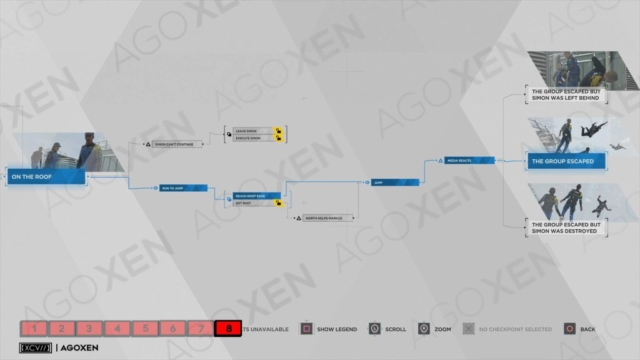
Detroit: Become Human The Stratford Tower Flowchart
Chapter 22: The Stratford Tower Flowchart is 100% complete. This is a long, branching chapter that will take many playthroughs to fully complete. The checkpoint ‘On the Top Floor‘ is the closest one that can allow you to fill all the branching end paths.
Detroit: Become Human The Stratford Tower Endings
There are three possible endings to this chapter. This particular mission from Markus has no chance of failing, although you can lose a party member. Simon can either be left behind or destroyed in this chapter. If you want the entire group to escape, there are some key points in this chapter that you cannot mess up. No alarms can be activated.
Firstly, when Markus and North enter the server room, Markus has to make sure to lock the door as North suggests. On the way to the broadcast room, the security must be incapacitated without alerting central security. You must choose the option of a Ruse. Thirdly, once inside the broadcast room, you must shoot the operator as he tries to escape.
If an alarm is sound, the police force will storm the broadcast room before the group has a chance to escape to the rooftop. Simon will be damaged in the gunfire and either die on the spot, or must be left behind. If you really want Simon back into the group, don’t allow Connor to find him in chapter: Public Enemy. This way, Simon will return to the group in Freedom March.
If you enjoyed the Detroit: Become Human The Stratford Tower Walkthrough check out the other chapters on the launch page here. Each post will also have the chapter flowcharts and endings. Click here to go to the next chapter: Public Enemy. You can leave a question or comment below and I will answer it when I can.



Be the first to comment